Perfectly Grilled Corn on the Cob: Step-by-Step Recipe Guide

Corn on the cob is a beloved summer staple that brings joy to backyard barbecues and picnics alike. Its versatility makes it a favorite among food enthusiasts, as it can be prepared in various ways to suit different tastes and preferences. Whether boiled, grilled, or roasted, corn on the cob offers a delightful burst of sweetness and a satisfying crunch with every bite. In this step-by-step recipe guide, we will explore the different methods of cooking corn on the cob to help you create the perfect dish that will leave your taste buds craving for more. So let's dive in and uncover the secrets behind achieving perfectly grilled corn on the cob!
Step 1: Choosing the Perfect Corn
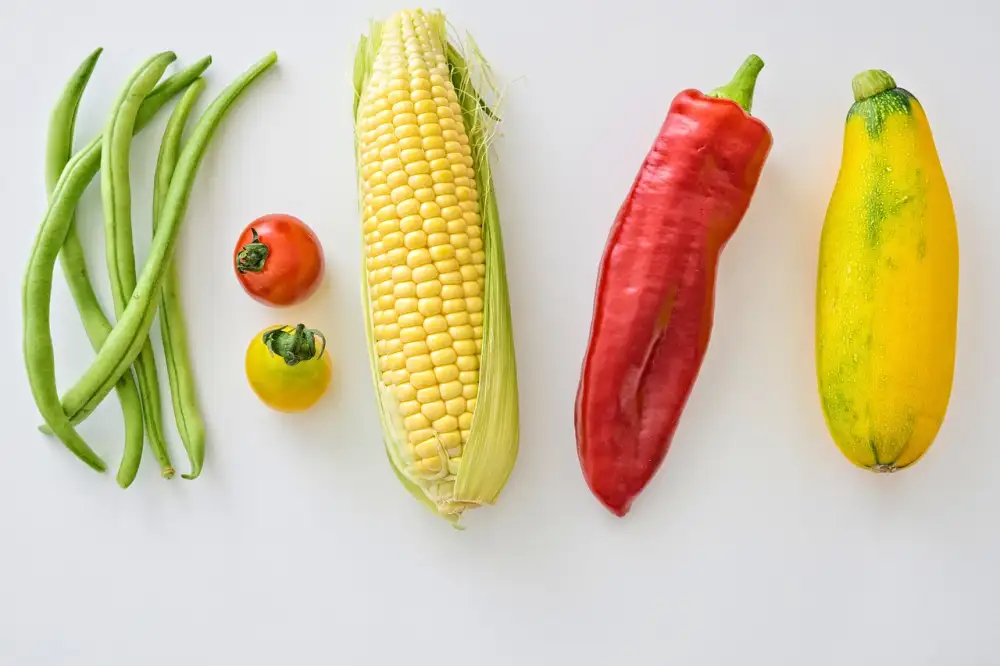
When it comes to grilling corn on the cob, selecting the right ears is crucial for achieving that perfect balance of sweetness and tenderness. Here are a few tips to help you choose the best corn for your grilled masterpiece.
Firstly, look for corn with bright green husks that are tightly wrapped around the ear. This indicates freshness and ensures that the kernels inside are plump and juicy. Avoid corn with dry or brown husks, as they may be past their prime.
Next, gently peel back a small portion of the husk to examine the kernels. They should be tightly packed and evenly spaced, with no gaps or missing rows. The kernels should also be firm and milky in appearance.
Additionally, feel the ear of corn to assess its weight. A heavier ear usually indicates more moisture content, which translates into a juicier final result.
Lastly, don't forget to check for any blemishes or insect damage on the husk. While minor imperfections can be overlooked, avoid corn with moldy spots or signs of decay.
By following these guidelines, you'll ensure that you're starting with high-quality corn that will elevate your grilled corn on the cob experience to new heights of flavor and satisfaction.
Step 2: Preparing the Corn
Before grilling the corn on the cob, it's important to properly prepare it. Start by removing the husks and silk from each ear of corn. Peel back the husks, taking care not to tear them completely off. Remove all the silk strands, ensuring that the corn is clean and ready for cooking.
Once the husks and silk have been removed, rinse the corn under cold water to remove any remaining dirt or debris. Pat dry with a clean towel.
Next, you have two options for preparing the corn: leaving it plain or brushing it with oil or melted butter. Leaving it plain allows you to fully taste the natural sweetness of the corn, while brushing it with oil or butter adds a rich flavor and helps prevent sticking on the grill.
If you choose to brush the corn with oil or butter, use a pastry brush to evenly coat each ear. Make sure to cover all sides of the corn for an even distribution of flavor.
By properly preparing your corn on the cob, you are setting yourself up for a delicious and flavorful grilling experience.
Step 3: Boiling the Corn
Boiling corn on the cob is a classic method that brings out its natural sweetness and tenderness. Here's how to achieve perfectly boiled corn every time:
1. Fill a large pot with enough water to fully submerge the corn cobs.
2. Add salt to the water for extra flavor. Use about 1 tablespoon of salt per quart of water.
3. Bring the water to a rolling boil over high heat.
4. Gently place the corn cobs into the boiling water, making sure they are fully submerged.
5. Reduce the heat to medium-high and let the corn cook for about 5-7 minutes, or until it becomes bright yellow and tender.
6. To check if the corn is done, insert a fork into one of the kernels. It should easily pierce through without any resistance.
7. Once cooked, carefully remove the corn from the pot using tongs or a slotted spoon.
8. Let the excess water drain off before serving.
Boiled corn on the cob is delicious on its own, but you can also enhance its flavors by brushing it with melted butter or sprinkling some herbs like parsley or cilantro on top. Now that your corn is perfectly boiled, let's move on to grilling it for an even more flavorful experience!
Step 4: Grilling the Corn
Grilling corn on the cob adds a smoky and charred flavor that takes this classic summer dish to a whole new level. Follow these simple steps to achieve perfectly grilled corn every time:
1. Preheat your grill to medium-high heat. This will ensure that the corn cooks evenly and gets those beautiful grill marks.
2. Remove the husks and silk from the corn, making sure to remove any excess silk strands. Rinse the corn under cold water to remove any remaining dirt.
3. Brush each ear of corn with melted butter or olive oil. This will help prevent sticking and add a rich flavor to the corn.
4. Place the corn directly on the grill grates, turning occasionally to ensure even cooking. Grill for about 10-15 minutes or until the kernels are tender and slightly charred.
5. If desired, you can also wrap each ear of corn in aluminum foil before grilling. This method helps retain moisture and intensifies the flavors.
6. Once grilled, remove the corn from the heat and let it cool for a few minutes before serving.
Grilled corn on the cob pairs well with a variety of toppings such as melted butter, grated cheese, lime juice, or chili powder. Get creative and experiment with different seasonings to enhance its natural sweetness.
Grilling brings out the natural sugars in corn, creating a caramelized exterior while keeping it juicy on the inside. The smoky flavors from the grill add depth and complexity that will leave your taste buds craving more.
Whether you're hosting a backyard barbecue or simply enjoying a summer evening, grilled corn on the cob is an absolute must-have dish that will impress your guests with its delicious flavors and beautiful presentation.
Stay tuned for Step 5: Roasting the Corn, where we explore another mouthwatering technique to elevate your culinary experience with this versatile vegetable!
Step 5: Roasting the Corn
Roasting corn on the cob adds a smoky and caramelized flavor that takes this classic summer dish to a whole new level. Once you have boiled the corn, it's time to fire up the grill or preheat your oven for roasting.
If you're using a grill, preheat it to medium-high heat. Place the boiled corn directly on the grates and let it cook for about 10-12 minutes, turning occasionally until it becomes slightly charred and golden brown.
For oven roasting, preheat your oven to 425°F (220°C). Place the boiled corn on a baking sheet lined with aluminum foil. Roast for about 15-20 minutes, turning halfway through, until the kernels are tender and have developed a beautiful roasted color.
Roasting brings out the natural sweetness of corn while adding a delightful smokiness. The heat caramelizes the sugars in the corn, creating an irresistible flavor profile that will leave you craving more.
Once roasted, remove the corn from the grill or oven and let it cool slightly before serving. The kernels will be bursting with juiciness and enhanced flavors that will make every bite a pure delight.
Roasted corn on the cob is perfect as is, but if you want to take it up a notch, consider brushing some melted butter over each ear of corn and sprinkling them with your favorite seasonings like chili powder, garlic powder, or grated Parmesan cheese.
Whether enjoyed as a side dish at a backyard barbecue or as part of a summery meal, roasted corn on the cob is guaranteed to be a crowd-pleaser. Its smoky-sweet flavors will transport you straight to warm summer days filled with laughter and delicious food.
Step 6: Seasoning and Serving Suggestions
Once your perfectly grilled corn on the cob is ready, it's time to take it to the next level with some delicious seasonings and serving suggestions. Here are a few ideas to enhance the flavors:
1. Classic Butter and Salt: Spread a generous amount of butter on the warm corn and sprinkle with salt for a simple yet satisfying taste.
2. Mexican Street Corn: Slather the grilled corn with mayo, sprinkle with crumbled cotija cheese, drizzle with lime juice, and dust with chili powder for a tangy and spicy twist.
3. Herb-infused Butter: Mix softened butter with chopped fresh herbs like parsley, cilantro, or chives. Spread this flavorful butter on the corn for an aromatic experience.
4. Parmesan Garlic Corn: Combine grated Parmesan cheese, minced garlic, melted butter, and a pinch of black pepper. Brush this mixture onto the corn for a savory and cheesy delight.
5. Asian-inspired Sesame Soy Glaze: Whisk together soy sauce, sesame oil, honey, minced ginger, and garlic in a small bowl. Brush this glaze over the grilled corn for an umami-packed flavor.
When it comes to serving suggestions, you can enjoy your grilled corn on its own as a tasty side dish or incorporate it into other recipes like salads or salsas. You can also cut off the kernels from the cob and use them in soups or stir-fries for added texture and sweetness.
No matter how you choose to season or serve your grilled corn on the cob, one thing is certain – it will be bursting with delightful flavors that will leave you craving more!
In conclusion, corn on the cob is a versatile and delicious dish that can be enjoyed in various ways. Whether you choose to boil, grill, or roast it, each method brings out unique flavors and textures that will tantalize your taste buds. The simplicity of seasoning with butter, salt, and pepper allows the natural sweetness of the corn to shine through.
So next time you're looking for a tasty side dish or a flavorful addition to your summer barbecue, consider trying out one of these step-by-step recipes for perfectly grilled corn on the cob. With just a few simple steps, you can transform this humble vegetable into a mouthwatering treat that will leave everyone asking for more.
So go ahead, grab some fresh corn from your local market or garden and get ready to savor the delightful flavors of corn on the cob. Whether you enjoy it as a standalone snack or pair it with your favorite grilled meats and vegetables, this classic dish is sure to bring joy and satisfaction to any meal. Happy cooking!
Published: 19. 12. 2023
Category: Recipes


